Installing a home surveillance system is one of the most effective ways to improve security and gain peace of mind. However, many beginners focus only on choosing the right cameras and forget one of the most important parts of the entire setup: wiring. Poor planning of surveillance wiring can lead to weak connections, messy installations, signal loss, or even system failure.
Whether you are installing a few indoor cameras or building a full outdoor security network, proper wiring planning ensures your system is stable, reliable, and future-proof. In this guide, we will walk through everything you need to know about planning wiring for a home surveillance system, including camera types, cable selection, layout design, and installation tips.
Contents
Understanding Your Surveillance System Type
Before planning any wiring, you need to understand what type of surveillance system you are installing. The wiring method depends heavily on this choice.
Analog CCTV Systems
Traditional analog systems use coaxial cables to transmit video signals from cameras to a DVR (Digital Video Recorder). These systems are often more affordable but require separate power cables unless using combined solutions like Siamese cables.
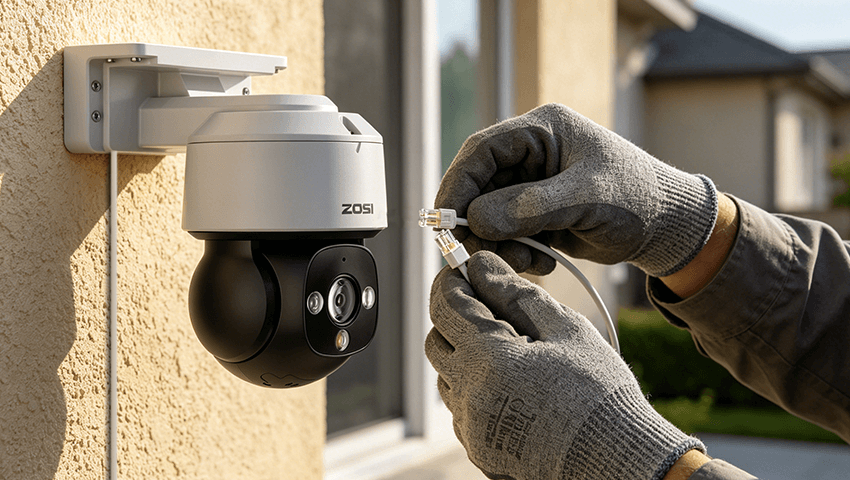
IP Camera Systems
IP (Internet Protocol) cameras are more modern and use Ethernet cables to transmit both video and data. Most IP cameras also support Power over Ethernet (PoE), which allows a single cable to handle both power and data. This significantly simplifies wiring.
Wireless Systems (with Wired Power)
Even “wireless” systems often still require power cables. They reduce video cabling but still need careful planning for power outlets and adapters.
For beginners, PoE IP camera systems are usually the easiest and cleanest option for wiring.
Planning Camera Placement First
Wiring should always come after camera placement planning. You cannot design an efficient cable layout without knowing where your cameras will be installed.
Key areas to cover:
– Front door and entry points
– Back door and side entrances
– Driveway and garage
– Ground-floor windows
– Backyard or garden
– Indoor hallways or main living areas
Important considerations:
– Avoid pointing cameras directly at strong light sources (sun or lamps)
– Ensure each camera has a clear field of view
– Think about height (usually 8–10 feet is ideal for outdoor cameras)
– Consider future expansion (leave room for additional cameras)
Once you finalize camera positions, you can start mapping cable routes.
Designing the Wiring Layout
A well-designed wiring layout saves time, money, and frustration during installation.
Centralized Wiring System
In most home surveillance setups, all cables run back to a central location such as:
– A network switch (for IP systems)
– A DVR/NVR unit
– A dedicated security cabinet or utility room
This “star topology” makes maintenance easier and improves system organization.
Cable Routing Strategy
When planning routes:
– Follow walls, ceilings, or corners to hide cables
– Use attic spaces or crawl spaces when possible
– Avoid running cables near high-voltage electrical wiring to prevent interference
– Measure distances carefully to avoid cable shortage
Outdoor Routing Tips
– Use weatherproof conduits for all exposed cables
– Seal all wall entry points with waterproof silicone
– Keep cables elevated to avoid water damage and pests
Power Supply Planning
Power is often overlooked but is essential for system stability.
PoE Systems (Recommended)
With PoE switches or injectors, power and data travel through a single Ethernet cable. This reduces clutter and simplifies installation.
Traditional Power Adapters
If not using PoE:
– Ensure each camera has a nearby power source
– Use a centralized power distribution box for multiple cameras
– Avoid overloading outlets
Backup Power Consideration
For better reliability:
– Install a UPS (Uninterruptible Power Supply) for your recorder and network devices
– This ensures cameras continue recording during power outages
Network and Connectivity Considerations
For IP-based systems, wiring is closely tied to network design.
Key points:
– Use a reliable router and switch with enough ports
– Consider a PoE switch for simplified wiring
– Ensure your internet upload speed supports remote viewing
– Segment surveillance traffic if possible (for larger systems)
A stable network ensures smooth video streaming and reliable remote access.
Common Wiring Mistakes to Avoid
Beginners often make avoidable mistakes that affect system performance.
Mistakes include:
– Running cables without planning camera locations first
– Using indoor cables outdoors
– Mixing power and data cables without protection
– Ignoring future expansion needs
– Poor cable management leading to clutter
– Long unshielded cable runs causing signal loss
Avoiding these issues from the beginning will save significant time and repair costs later.
Installation Best Practices
Once planning is complete, installation should follow structured steps:
– Label all cables before installation
– Test each cable before final mounting
– Secure cables every few feet to prevent sagging
– Keep all connections inside junction boxes when outdoors
– Document your entire wiring layout for future maintenance
Good organization during installation ensures easier troubleshooting later.
Conclusion
Planning wiring for a home surveillance system is just as important as choosing the right cameras. A well-thought-out wiring design ensures stable performance, cleaner installation, and long-term reliability. By understanding your system type, carefully planning camera placement, selecting the right cables, and designing an efficient layout, you can build a professional-quality security system even as a beginner.
Remember, the goal is not just to install cameras—but to build a system that works consistently, safely, and efficiently for years to come.
Related Posts
 The Ultimate Home Protection Plan for a Worry-free Vacation
 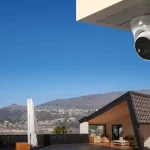 Top 2 Wired Security Camera Systems 2023 (Reviews, Videos & Wiring Guide)
 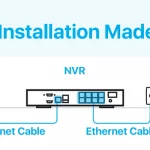 PoE Security System for Easier Installation: Don’t Worry about Wiring?
 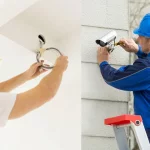 Wiring Security Camera Cables Made Easy: Tips and Techniques
 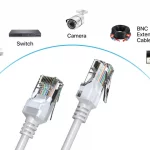 Cat5 Wiring: Navigating the Basics of Network Cabling