Door security cameras have become an essential part of modern home security. Whether you want to monitor your front porch, keep an eye on deliveries, or enhance overall safety, installing a door security camera correctly is crucial. A poorly installed camera can result in blind spots, weak WiFi signals, or missed alerts, defeating the purpose of investing in a high-quality device.
In this guide, we’ll walk you through everything you need to know to install a door security camera properly. From choosing the right device to positioning, setup, and troubleshooting, this article is your step-by-step roadmap to a safer home.
Contents
Why Door Security Cameras Are Important
Protect Your Home and Family
Door security cameras provide peace of mind by allowing you to monitor the entrance to your home at all times. They act as a deterrent to potential burglars and give homeowners real-time access to who is approaching their door.
Prevent Package Theft and Break-ins
With the rise of online shopping, package theft has become a growing concern. Door cameras with motion detection and two-way communication allow you to see and speak to anyone approaching your doorstep, reducing the risk of theft and vandalism.
Benefits of Real-Time Monitoring
Modern cameras offer live streaming to your smartphone or tablet, allowing you to keep tabs on your property no matter where you are. Many cameras also send instant alerts when motion is detected, helping you respond quickly to potential threats.
Types of Door Security Cameras
1. Wired vs. Wireless Cameras
Wired cameras typically offer more stable connections and do not rely on WiFi signals. However, installation can be more complicated, requiring power lines and network cables.
Wireless cameras are easier to install and can be placed more flexibly, but their performance depends heavily on WiFi coverage and signal strength.
2. Video Doorbells
Video doorbells combine the functionality of a camera and a doorbell. They allow you to see, hear, and talk to visitors directly through a mobile app. Many also include motion detection and cloud recording features.
3. Indoor vs. Outdoor Cameras
While door security cameras are typically outdoor devices, some homes use indoor cameras facing entryways for added coverage. Outdoor cameras must be weather-resistant and durable, while indoor cameras focus more on high-resolution monitoring and integration with home automation.
4. AI-Powered vs. Standard Cameras
AI-enabled cameras can differentiate between people, pets, and vehicles, reducing false alerts. Standard cameras record motion events without distinguishing between subjects, which may lead to unnecessary notifications.
Preparation Before Installation
1. Tools You’ll Need
Before starting, gather the necessary tools:
— Screwdriver or drill
— Screws and wall anchors (usually included)
— Ladder (for higher door frames)
— Smartphone or tablet for app setup
— Pencil and level for marking
2. Choosing the Right Spot for Your Door Camera
Position your camera at a height between 48–60 inches for optimal facial recognition and motion capture. Ensure the lens captures the full view of your doorstep, including porch areas and steps. Choosing the correct installation location is just as important as selecting the camera itself. Read How to Choose the Best Outdoor Security Camera for Your Home to learn which features matter most for entryway surveillance.
3. Checking WiFi Signal Strength
If using a wireless camera, check WiFi coverage near your door. Weak signals can cause intermittent streaming or missed notifications. Consider a WiFi extender if coverage is poor.
4. Safety Precautions
Wear gloves and safety glasses when drilling. If your installation involves electrical work, turn off the relevant circuits to prevent accidents. Always follow the manufacturer’s safety guidelines.
Step-by-Step Installation Guide
Step 1 – Mounting the Bracket
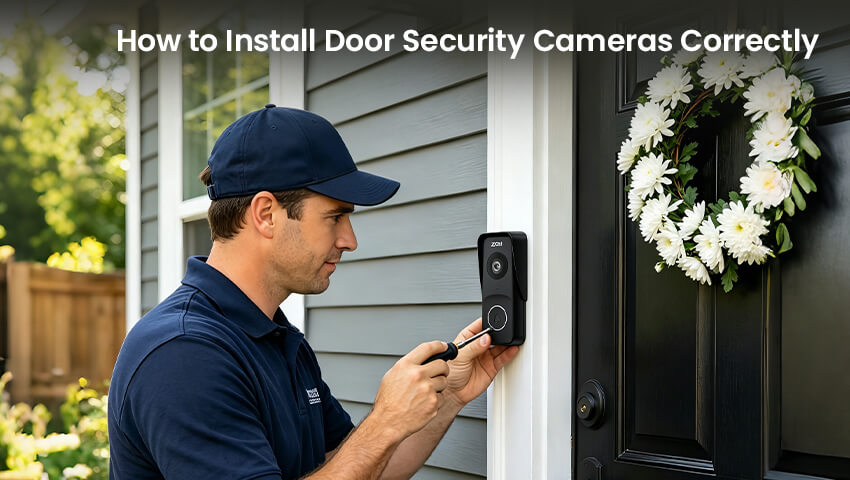
Use a pencil to mark screw holes based on the mounting bracket. Ensure the bracket is level to avoid skewed camera angles. Drill holes carefully and insert anchors if mounting on masonry or concrete surfaces.
Step 2 – Attaching the Camera
Align the camera with the bracket and secure it using the screws provided. Double-check that the camera can swivel or tilt if your model allows it, so you can adjust the viewing angle later.
Step 3 – Connecting to Power and WiFi
For wired cameras, connect the power and network cables. Wireless cameras may require charging or connecting to a power source. Follow the app instructions to pair your camera with your home network. Test connectivity before moving on.
Step 4 – Testing the Camera
Open the camera app to check the live feed. Adjust the camera angle to ensure the entire doorway is visible. If you’re unsure whether your camera covers the entire entrance, our guide on How to Eliminate Blind Spots in Backyard Surveillance explains camera positioning principles that also apply to front door monitoring. Test motion detection and two-way audio to confirm everything is functioning correctly.
Optional: Integrating With Smart Home Devices
Many cameras can integrate with Alexa, Google Home, or other smart home systems. If you plan to control your security camera with voice assistants, make sure your smart home integration is configured correctly. If you run into setup or connectivity issues, our guide Why Is Alexa Not Working? Easy Fixes for Alexa Not Responding or Connecting provides practical troubleshooting tips.
Integration allows you to receive voice alerts, automate routines, or even trigger smart lights when motion is detected.
Tips for Optimal Camera Performance
Ideal Height and Angle
Install your camera at eye level, around 48–60 inches above the ground. Angle it slightly downward to cover the entire doorstep without creating blind spots.
Avoiding Glare and Obstructions
Avoid placing the camera directly facing bright lights or glass reflections. Overhanging eaves or objects like plants should not block the field of view.
Night Vision Setup
Ensure night vision settings are enabled. Test the camera at night to confirm it captures clear images without excessive glare or shadows.
Regular Maintenance
Clean the camera lens periodically and check for any debris that could obstruct the view. Software updates can improve performance and fix bugs.
Common Installation Problems and Solutions
WiFi Connectivity Issues
If your camera loses connection, reposition it closer to the router or use a WiFi extender. Some cameras support dual-band WiFi (2.4GHz and 5GHz) for better coverage.
Camera Not Showing Live Feed
Ensure the camera is powered and properly connected to the app. Restart the camera or reinstall the app if necessary.
Motion Detection Not Working
Check the camera’s motion detection sensitivity in the app. Avoid placing the camera near moving trees, bushes, or roadways that may trigger false alerts. Cameras equipped with AI person detection can better distinguish people from other moving objects, helping reduce unnecessary notifications. Learn more in How AI Human Detection Works in Security Cameras.
Software/App Configuration Errors
Keep your app and camera firmware updated. Follow the manufacturer’s troubleshooting steps for configuration issues.
FAQs
Q: What’s the best height for a door camera?
A: 48–60 inches above ground is ideal for capturing faces and motion accurately.
Q: Can I install a door camera without drilling?
A: Some wireless cameras offer adhesive mounts or magnetic brackets, but drilling is generally recommended for long-term stability.
Q: How to connect a wired camera to my home network?
A: Use an Ethernet cable to connect the camera to your router or network switch. Follow the manufacturer’s app instructions to configure it.
Q: How do I secure the camera against tampering?
A:Install the camera out of easy reach, use tamper-resistant screws, and enable notifications for disconnections or movement.
Conclusion
Installing a door security camera correctly ensures reliable monitoring, clearer video footage, and better overall security for your home. By choosing the right camera, following proper installation steps, and maintaining your device, you can enjoy peace of mind knowing your front door is always under watch.
Related Security Guides
- Package theft prevention during Christmas shopping
- Best Places to Install Indoor Security Cameras
- How to Install Home Security Camera Easy and Efficient
- Best Door Cameras for Apartments
- How to Choose Outdoor PTZ Camera for Your Property