Network Setup
The Network Setup menu will allow you to configure your NVR so that it’s able to connect to the Internet. Once connected to the Internet, your NVR
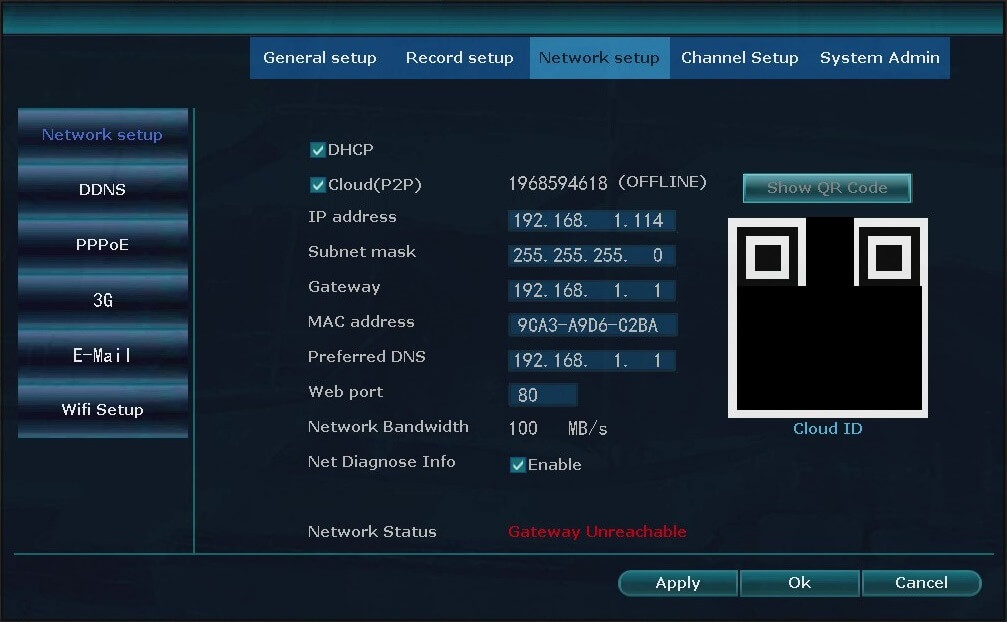
- DHCP – Enable this option to allow the NVR to find its own IP address.
- Cloud (P2P) – Enable this option if you want to view your footage remotely. The number shown is your NVR’s unique Cloud ID.
- IP Address – This field displays the current IP address assigned to your NVR.
- Subnet Mask – This field displays the current Subnet Mask assigned to your NVR.
- Gateway – This field displays the current Gateway assigned to your NVR.
- MAC Address – This field displays the current MAC address assigned to your NVR.
- Preferred DNS – This field displays the local DNS information.
- Web Port – Displays the port used by the NVR used to send and receive information from outside connections.
- Network Bandwidth – Displays the bandwidth the NVR is utilizing.
- Net Diagnose Info – Enable this option to activate the automatic network diagnostic feature.
- Network Status – This section will allow you to see if your NVR has an active internet connection.