Connecting an IP camera to your PC or computer monitor is easier than you may think. An IP camera can connect directly to your network or computer in three ways, and the five solutions listed below do not require an NVR. It’s important to install your security cameras in the right positions first. You can refer to How to Install Home Security Cameras Successfully for guidance.
Additionally, I’ve covered third-party software to connect your IP camera to a computer in the previous section.
These methods will guide you on how to connect a wireless or PoE IP camera to a PC (on Windows 10, Windows 8.1, Windows 8, Windows 7, Windows XP, and Windows Vista) and to a Mac (on Mac OS X 10.13, 10.12, 10.11, 10.10, 10.9, etc.).
It’s important to note that the methods recommended below may not apply for battery-powered security cameras, which require initial setup on your phone.
Contents
Do I need a NVR for my IP security camera system?
While a NVR is not necessary to view your network cameras or even record video, it is a reliable and recommended option. If you are testing cameras, looking for a temporary setup, or want to set up something inexpensive, using a computer with an IP camera is a good alternative to a NVR. However, this kind of processing will demand a lot from the computer, and it may not be able to handle high resolution IP network cameras. Additionally, computers can be unreliable and crash, potentially leaving you with no recorded video.
NVR products are standalone devices that use a Linux operating system, which is known to be rock-solid and crash-free. They are designed to operate 24/7 and maintain system security with user account access permissions. For a complete security camera system, it’s best to use a NVR along with cameras.
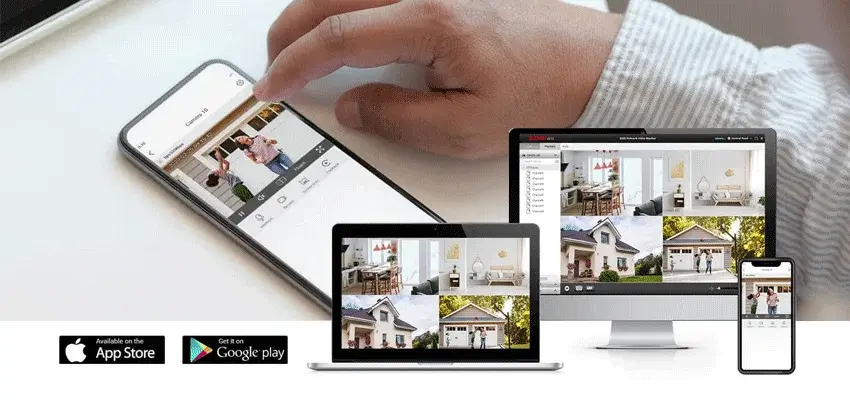
Zosi Smart APP can be used as a client software to connect from a computer to an NVR to watch cameras connected to the NVR and to playback/download recorded security footage. However, it’s important to note that using a NVR is a more reliable and secure option for your IP security camera system.
5 Solutions to Connect Your Security IP CCTV Camera to PC/Mac
Solutions 1: Connect a WiFi or PoE Camera Directly to PC/Mac (without Internet)
If you want to connect your security IP camera directly to your PC/Mac without an NVR or DVR, without a router network, without WiFi, and without any fees or complicated configuration, follow these steps:
Requirements:
- Your WiFi or PoE camera
- The camera’s power adapter
- Your computer (desktop or laptop)
- A network cable
Step 1: Charge your security camera
Use the power adapter to plug in and charge the camera. Normally, when you buy a WiFi IP camera, it comes with a power adapter. For a PoE camera, ask the supplier and buy one that is compatible with the camera.
Step 2: Connect the camera and the computer with a network cable
Find the network connector from the 2-in-1 or 3-in-1 cable attached to the camera and use a network cable to connect to it. Then connect the other end of the network cable to the computer. If your computer already has a network, disable it to ensure that your computer is offline.
Step 3: Find the security camera’s IP address on the computer
Scan and find out the camera’s IP address using surveillance software from the same supplier as the camera. For example, ZOSI Smart App will automatically scan all the cameras in the same local LAN and show the default IP address of the camera.
Step 4: Change Your Computer’s IP Address to Match the IP Camera’s Network Prefix
In Step 3, you obtained the default IP address of your security camera. Let’s say the default IP address of the camera is 192.168.177.100, and now you need to change your computer’s IP address to 192.168.177.x, where x identifies the node/host and is a number between 2 and 254. For example, if your computer’s IP address is 192.168.177.12, it’s already on the same network prefix as the camera.
IP Address 101: An IP address consists of two parts – one belongs to the network address, and one belongs to the node address. All nodes on a given network share the same network prefix but have a unique host number.
To change your computer’s IP address (using Windows 10 as an example):
- Press the Windows + R keyboard shortcut to bring up the Run box.
- Enter “ncpa.cpl” and open the “Network Connections” window.
- Right-click your computer’s network adapter and select “Properties.”
- Select your computer’s Internet Protocol Version and click “Properties.”
- Select “Use the following IP address” and change the IP address to 192.168.177.12.
Now your IP camera is connecting directly and communicating with your PC because they are in the same network. You can watch your IP camera with ZOSI Client on your computer.
Note: Since there is no router network, the IP camera will not transmit data or send alarms to your phone. However, you can record and save all the footage onto your computer.
If you plan to use your IP camera with your computer all the time without a router network, change the default status of your IP camera’s IP address to static. Otherwise, each time you reboot the IP camera, its IP address will change, and you will need to repeat the steps above. To keep the IP camera’s IP address the same, go to “Device Settings” and “Network General” on the Client (ZOSI Client in our test), and choose “Static” for “Network Access”.
Solution 2: Connect a Wireless/WiFi Camera to Your Computer via Router (With Internet)
If you have a WiFi network and need to remotely view the IP camera when you’re not there, you can connect your wireless or WiFi camera to your computer wirelessly via your router.
Requirements:
- Your WiFi camera
- The camera’s power adapter
- Your computer (desktop or laptop)
- A network cable
- A router
Step 1: Charge your WiFi security camera
Use the power adapter to plug in and charge the camera.
Step 2: Connect the camera and the router with a network cable
A WiFi camera needs to connect to the router with a network cable for initial setup because the new camera itself wouldn’t recognize and auto-pick up a network that it never uses. Find the network connector from the 2-in-1 or 3-in-1 cable attached to the camera and use a network cable to connect to it. Then connect the other end of the network cable to the router.
Step 3: View the IP camera on your PC/Mac
Launch the surveillance software on your computer to add the camera and watch the live view directly. For example, open ZOSI Smart App, and since the computer and the camera are in the same network, ZOSI Client will automatically search and display the camera directly. Click “Start,” and you can view the camera on your PC. You can also set up the configurations for all the functions you want the camera to have.
Step 4: Set up WiFi settings and remove the network cable
Make the WiFi settings for the camera by navigating to “Device Settings” and “Network” on the software. Choose the WiFi network, enter the password, and done. After that, remove the network cable, and the security IP CCTV camera will connect to your computer wirelessly.
Note: If you need to view the IP camera from another computer that is not on the same network, you need to input the camera’s UID into the software to remotely access the camera.
Solution 3: Connect a PoE (Wired) IP Camera to Your Computer Without PoE Injector/Switch
Connecting a PoE wired IP camera to your computer via the router is similar to that of a WiFi camera and even easier because you don’t need to use a power adapter, set up the WiFi, or remove the network cable.
Requirements:
- Your PoE camera
- Your computer (desktop or laptop)
- A network cable
- A router with PoE feature
Step 1: Connect the camera and the router with a network cable
PoE (Power over Ethernet) means you can use a single network cable for both video and power transmission. Connect the camera to the router via the network cable, and the camera will get power supply and network access.
Note: Ensure that your router has the PoE feature. If not, try the next solution.
Step 2: View the IP camera on your computer
Launch the surveillance software on your computer to add the camera and watch the live view directly. For example, open ZOSI Smart App, and since the computer and the camera are in the same network, ZOSI Smart App will automatically search and display the camera directly. Click “Start,” and you can view the camera on your PC. You can also set up the configurations for all the functions you want the camera to have.
Note: If you need to view the IP camera from another computer that is not on the same network, you need to input the camera’s UID into the software to remotely access the camera.
Solution 4: Connect a PoE (Wired) IP Camera to Your Computer with a PoE Injector/Switch
If your router does not support PoE, you need a PoE injector or PoE switch to connect your IP camera to your PC.
Requirements:
- Your PoE camera
- The camera’s power adapter
- Your computer (desktop or laptop)
- A network cable
- A router
- A PoE injector or PoE switch
Connecting a PoE IP camera to your PC via a PoE injector/switch is similar to connecting it without a PoE injector/switch. Follow the steps below:
Connect all the devices as shown in the picture below:
Ensure that your wireless IP camera is connected to a power supply.
Add the camera to ZOSI Client and watch the live view directly.
Note: If you need to view the IP camera from another computer that is not on the same network, you need to input the camera’s UID into the software to remotely access the camera.
Solution 5: Connect a CCTV Camera System to Your PC/Mac (With or Without Network)
ZOSI PoE security camera systems, such as the PoE kit ZOSI C225, have their own proprietary networks and can work with or without your router network.
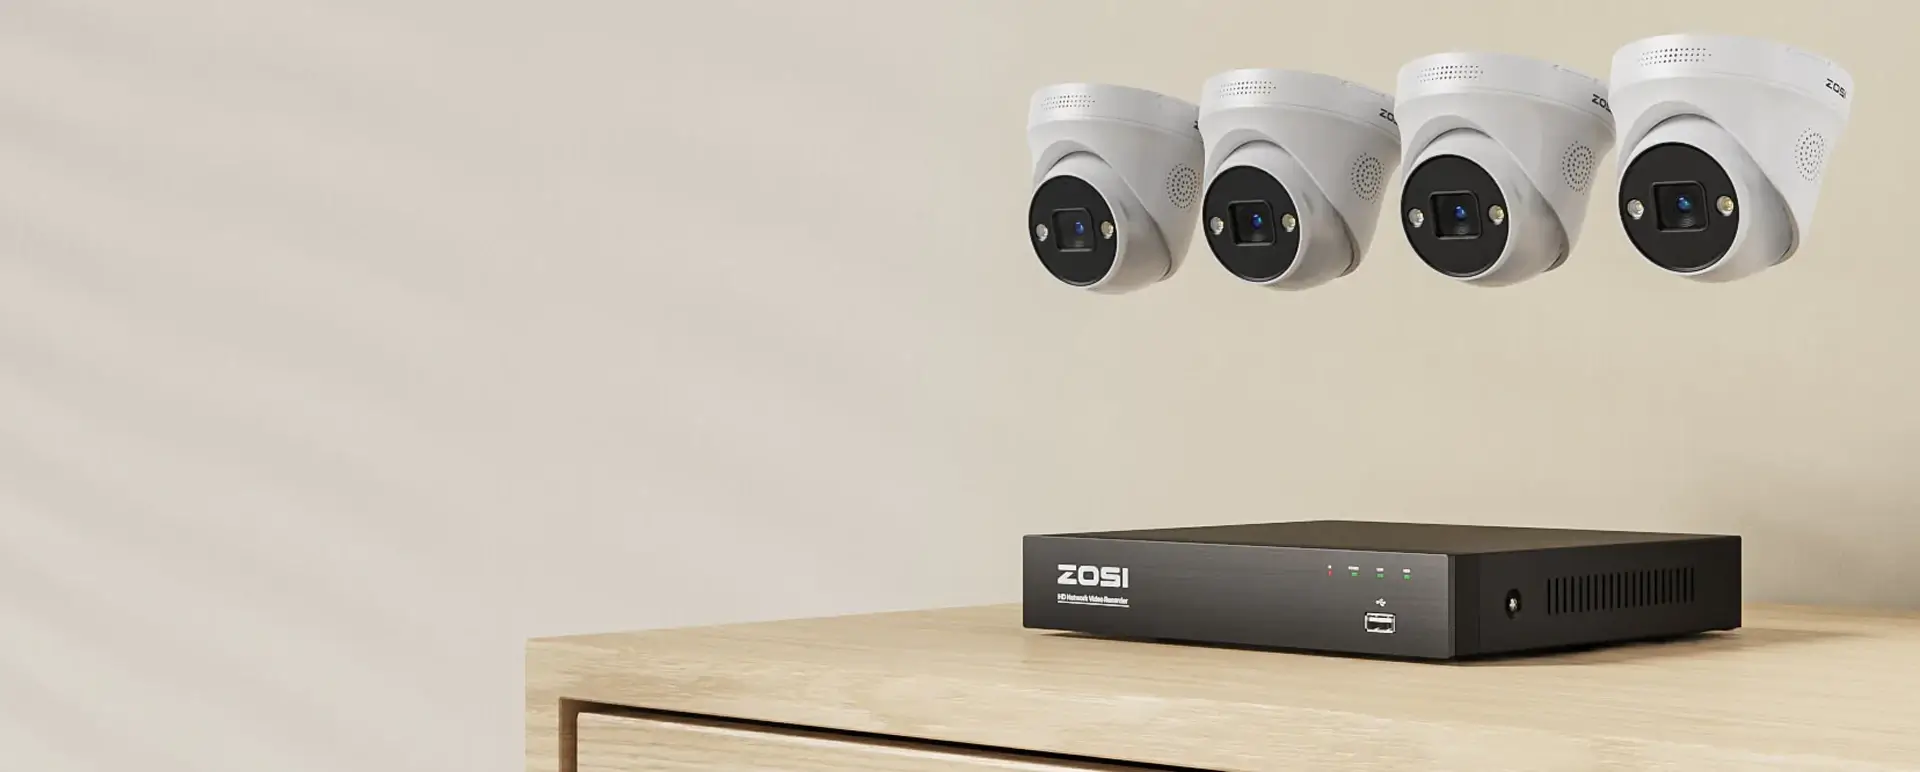
C225 - 4K POE Surveillance Cameras Security Monitor Systems
- 4K Ultra HD
- Smart Person/Vehicle Detection
- Customize Detection Zone
- Starlight Night Vision
- 24/7 Video & Audio Recording
- Access Remotely & Flexibly
- Two Way Audio
To connect a CCTV security camera system to your computer, follow the steps below:
Without router network:
- Step 1: Connect all the cameras to the NVR. When you receive the new IP camera system you bought, connect all the devices you got – connect the NVR to your computer’s monitor and the mouse, use the power adapters to charge the NVR and cameras, etc. For a WiFi system, once the WiFi NVR and the WiFi cameras are charged, they will automatically connect to each other and start to communicate. For a PoE system, connect the PoE cameras to the NVR via the network cables provided.
- Step 2: Start watching the IP cameras. The startup and setup wizard will pop up to guide you to watch your cameras and do other configurations. Now you can see all the IP cameras on your monitor and start recording.
With router network:
- Step 1. Repeat Step 1 above
- Step 2.Connect the NVR to your router via the network cable provided.
- Step 3.Start watching the IP cameras.
The startup and setup wizard will pop up to guide you to watch your cameras and do other configurations.
Note: If you need to view the IP cameras from another computer that is not on the same network, you need to input the NVR’s UID into the software to remotely access the cameras.
Third-Party Software to Connect IP Camera to PC/Mac
Ensure that the software can handle all cameras on the network and support all camera features. Third-party software typically has multiple versions, and if you want to use all camera features, you may need to pay for a premium version. If your security IP camera is not working as expected or if you encounter any issues, try the top 10 solutions to fix IP cameras not working.
Related Posts
 Best Free IP Camera Software For Windows/Mac/iPhone/Android
  Solutions to Fix Security Camera Picture Problems: Top 12
  Eliminating Security Camera Condensation: 10 Proven Solutions for Clearer Images
  Video Loss on Security Cameras: Reasons & Solutions
  Top 6 Rural Home Security Solutions: How to Secure a Secluded, Rural Home