Outdoor security cameras are exposed to much more than just potential security threats. Rain, dust, humidity, sunlight, insects, temperature changes, and strong winds can all affect camera performance over time.
Even a high-quality outdoor security camera needs occasional maintenance. A dirty lens can make footage blurry, while a loose mounting bracket can gradually change the camera’s viewing angle. Moisture, damaged cables, or outdated firmware can also cause unexpected recording or connectivity problems.
The good news is that most routine maintenance is simple and can be completed in just a few minutes.
This outdoor security camera maintenance checklist covers the key things to inspect, clean, test, and adjust so your cameras can continue providing reliable surveillance throughout the year.
Contents
Outdoor Security Camera Maintenance Checklist at a Glance
Before going into detail, here is a quick checklist you can use for routine maintenance:
- Inspect the camera housing for cracks or physical damage
- Check that the mounting bracket is secure
- Clean the camera lens and protective cover
- Look for water, moisture, or condensation
- Inspect cables and connectors
- Check the camera’s viewing angle
- Test daytime and nighttime video quality
- Check infrared or color night vision
- Test motion detection and AI alerts
- Test audio and two-way talk, if available
- Check recording and storage
- Review firmware and app settings
- Inspect solar panels, if applicable
- Check the camera after storms or extreme weather
A monthly inspection is a good general starting point. Cameras installed in harsh environments may require more frequent checks.
Inspect the Camera Housing and Mount
Start by checking the physical condition of the camera.
Outdoor cameras are exposed to wind, rain, dust, and temperature changes. Over time, these conditions can loosen mounting hardware or cause damage to the camera housing.
Check the following:
Is the camera firmly attached to its mounting surface?
Has the mounting bracket become loose?
Are there visible cracks or damage to the housing?
Is the protective cover properly attached?
Has the camera angle changed?
Are there signs that insects or debris have entered the housing?
A camera that has shifted only a few degrees may no longer cover the area you originally intended to monitor.
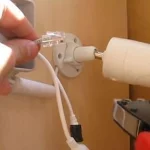
If the camera is loose, secure the mounting hardware according to the manufacturer’s installation instructions. Avoid forcing screws or modifying the housing, as this can potentially damage the camera or compromise its weather resistance.
Clean the Camera Lens and Protective Cover
One of the simplest maintenance tasks can also make a noticeable difference in image quality.
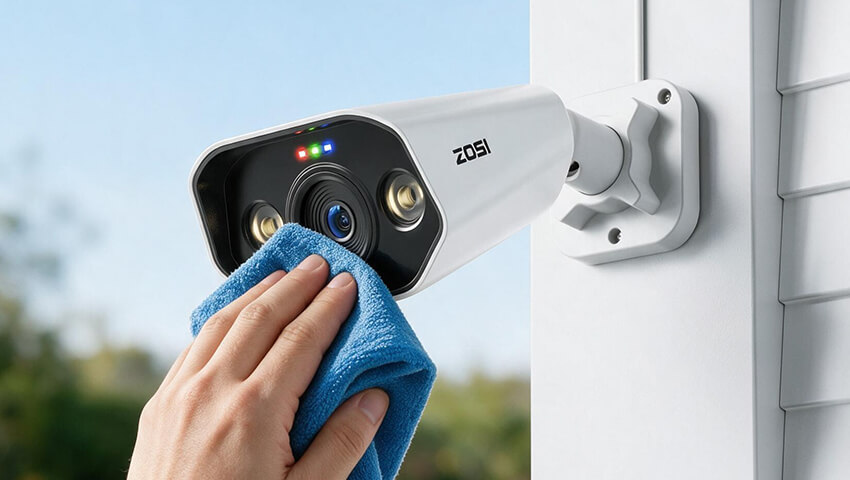
Dust, dirt, fingerprints, pollen, water spots, and insect residue can accumulate on the lens or protective cover. At night, these contaminants can become even more noticeable because infrared light or other illumination may reflect off them.
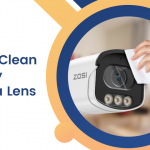
How to clean an outdoor security camera lens
Turn off or disconnect the camera if recommended by the manufacturer.
Remove loose dust with a soft, clean cloth or suitable air blower.
Gently wipe the lens or cover with a microfiber cloth.
If necessary, use a small amount of appropriate lens-cleaning solution.
Make sure the surface is completely clean and dry before restoring normal operation.
Avoid abrasive materials, aggressive household cleaners, or excessive pressure.
If your camera suddenly looks blurry, cleaning the lens should be one of the first troubleshooting steps.
Check for Water, Moisture, and Condensation
Outdoor cameras are designed to withstand outdoor conditions, but moisture should still be taken seriously.
Inspect the camera for:
Water droplets inside the lens cover
Fogging or condensation
Water stains
Corrosion around connectors
Damaged seals
Water pooling around cable connections
Occasional external moisture after rain is normal. However, persistent condensation or moisture inside the camera housing is not something to ignore.
If you notice moisture inside the camera, stop and check the installation, cable connections, seals, and mounting position. Follow the manufacturer’s troubleshooting and support guidance rather than opening a weather-sealed camera yourself.
For wired cameras, pay particular attention to cable connections. Poorly protected connectors can become vulnerable to water intrusion even when the camera itself is weather-resistant.
Inspect Cables, Connectors, and Power Supply
A camera cannot provide reliable surveillance if its power or network connection is unstable.
For wired security cameras, inspect the entire accessible cable path for:
Cuts or visible damage
Loose connections
Crushed or pinched sections
Signs of corrosion
Water exposure
Damaged cable insulation
For PoE cameras, check both ends of the Ethernet connection and make sure the connection is secure.
For Wi-Fi cameras, check whether the camera is maintaining a stable connection. If the camera frequently disconnects, consider whether anything has changed around the camera, such as a new obstruction, router relocation, or increased distance from the access point.
For wireless or battery-powered cameras, check the battery level and charging status regularly.
Don’t forget solar-powered cameras
If you use a solar security camera, inspect the solar panel as well. Dust, leaves, bird droppings, or other debris can reduce the amount of sunlight reaching the panel. Understanding how solar security cameras work can also help you better maintain the solar panel, battery, and charging performance.
Keep the panel clean and make sure nearby objects have not started blocking direct sunlight.
If your camera frequently disconnects, check your network connection, power supply, and installation environment. You can also learn more about common causes in our guide on why your security camera goes offline.
Check the Camera’s Field of View
Outdoor environments change over time.
A tree may grow into the camera’s view. New plants may block an entrance. A recently installed fence, outdoor decoration, vehicle, or other object may create a blind spot.
Take a few minutes to check whether the camera is still covering the areas that matter most.
For example, make sure important areas such as:
Driveways
Front doors
Back doors
Walkways
Garages
Gates
Yards
Business entrances
are still clearly visible.
If the camera has pan-and-tilt functionality, verify that it can move through its expected range without obstruction.
Test Video Quality and Night Vision
Don’t wait until a security incident occurs to discover that your camera’s image quality has deteriorated.
Test the camera during both daytime and nighttime.
During the day, check:
Image sharpness
Color accuracy
Bright and dark areas
Glare
Distortion
Obstructions
At night, check:
IR night vision
Color night vision, if supported
Brightness
Image clarity
Reflections
Overexposure
Dark areas or blind spots
If the image becomes unusually blurry or washed out, first clean the lens and check whether the camera angle has changed.
For cameras using infrared night vision, also check whether nearby objects are causing excessive IR reflection. Walls, windows, ceilings, or other reflective surfaces close to the lens can sometimes affect nighttime images.
Test Motion Detection and AI Alerts
A security camera may be recording correctly while its detection settings are no longer working as expected.
Periodically test your camera’s motion detection and, if supported, AI detection features.
Depending on the model, you may have options such as:
Person detection
Vehicle detection
Pet detection
Face detection
Motion detection
Custom detection zones
Walk through the monitored area and check whether the camera detects the event and sends the expected notification.
Also review your detection area and sensitivity settings. Changes to the environment can affect detection performance.
For example, moving tree branches, busy roads, pets, or other sources of motion may create unnecessary alerts.
At the same time, overly restrictive detection zones may cause important events to be missed.
The goal is not simply to maximize the number of alerts, but to receive useful alerts from the areas you actually need to monitor.
Modern security cameras can use AI detection to identify people, vehicles, and other activity. Learn how AI detection differs from traditional motion detection.
Test Audio and Two-Way Communication
If your outdoor camera includes a microphone or speaker, test the audio periodically.
Check whether:
Recorded audio is clear
The microphone is working
The speaker produces sound normally
Two-way talk works correctly
There is excessive background noise
Outdoor cameras can accumulate dirt or debris around microphone and speaker openings, so these areas should also be kept clean.
Avoid inserting sharp objects into small openings. If audio remains abnormal after basic cleaning and testing, consult the manufacturer’s troubleshooting guidance.
Check Storage and Recording
A camera that is powered on but not recording properly is not providing complete security coverage.
Periodically check whether your camera is actually saving footage as expected.
Depending on your system, storage may include:
microSD card
NVR or DVR hard drive
Cloud storage
Other network storage options
Check the recording timeline and confirm that recent footage can be played back.
For local storage, check the available storage space and recording settings. If your system uses loop recording, verify that older footage is being overwritten as expected.
It’s also worth testing playback periodically rather than assuming that recording is working simply because the camera appears online.
Check Firmware and App Settings
Security cameras are controlled not only by their physical hardware but also by firmware, apps, and configuration settings.
Periodically check whether your camera or recorder has a firmware update available.
You should also review important settings, including:
Recording schedule
Detection settings
Notification settings
Detection zones
Night vision settings
Image settings
Storage settings
Time and date
User permissions
Firmware updates can sometimes improve stability, compatibility, security, or camera functionality.
After updating firmware or changing major settings, test live view, recording, playback, and notifications to make sure everything continues to work as expected.
Prepare Your Cameras for Seasonal Weather
Different seasons can create different maintenance requirements.
Spring
After winter, check for:
Dirt and pollen
Loose mounting hardware
Water damage
Overgrown plants
Insect activity
Spring is also a good time to make sure vegetation has not started blocking the camera’s view.
Summer
Strong sunlight and high temperatures can affect outdoor equipment.
Check for:
Direct sunlight or glare
Overheating concerns
Dust buildup
Solar panel cleanliness
Vegetation growth
Make sure the camera is installed according to the manufacturer’s recommended environmental conditions.
Autumn
Falling leaves can quickly block cameras and solar panels.
Check for:
Leaves covering the lens
Leaves covering solar panels
New obstructions
Moisture buildup
Trim vegetation when necessary, especially around cameras monitoring entrances and driveways.
Winter
Cold temperatures, snow, ice, and shorter daylight hours can affect outdoor equipment.
Check for:
Snow or ice covering the lens
Reduced solar charging
Moisture or condensation
Damaged cables
Changes in nighttime image quality
Never scrape ice directly across a camera lens with a hard object. Allow it to melt naturally or follow the manufacturer’s cleaning recommendations.
Inspect Your Cameras After Severe Weather
In addition to routine maintenance, perform an inspection after severe weather.
Strong winds, heavy rain, hail, snow, or storms can cause problems that may not be immediately obvious.
Check whether:
The camera has shifted
The mounting bracket is still secure
The lens cover is damaged
Cables have moved or become exposed
Water has entered vulnerable areas
Nearby branches or debris are blocking the camera
For solar cameras, check that both the camera and solar panel remain securely mounted and correctly positioned.
A quick post-storm inspection can help identify problems before they result in missing footage.
Outdoor Security Camera Maintenance Schedule
You don’t need to inspect every component every day. A simple maintenance schedule can make the process much easier.
Every Month
Clean the lens if necessary
Check camera positioning
Test live view
Check recent recordings
Test motion detection and notifications
Check power/network status
Every 3–6 Months
Inspect the housing and mounting hardware
Check cables and connectors
Review detection zones and settings
Test night vision and audio
Check storage
Review firmware availability
Trim vegetation around cameras
After Severe Weather
Inspect the mounting system
Check for physical damage
Look for moisture or water intrusion
Check cables and connections
Confirm live view and recording
Verify that the camera has not shifted
Seasonally
Clean lenses and solar panels
Remove leaves and debris
Check for changing vegetation
Review nighttime performance
Prepare the system for upcoming weather conditions
FAQs
What should I check if my outdoor security camera stops recording?
Start by checking whether the camera has power and a stable network connection. Then check the recording schedule, microSD card or NVR/DVR storage, available storage space, and firmware. If live view works but recordings are missing, the problem may be related to storage or recording settings.
Can rain damage an outdoor security camera?
Outdoor security cameras are designed to withstand outdoor conditions when properly installed and used within their specified environmental limits. However, prolonged exposure to harsh weather, improper installation, damaged seals, or poorly protected cable connections can increase the risk of water intrusion. Always follow the manufacturer’s installation and weather-resistance recommendations.
How do I protect outdoor security camera cables from weather?
Keep cable connections away from direct exposure to rain whenever possible and use the appropriate waterproof connectors, junction boxes, or cable protection recommended by the manufacturer. Avoid leaving exposed connectors where water can collect. Regularly inspect cables for cracked insulation, corrosion, or other damage.
Do solar security cameras need maintenance?
Yes. Solar security cameras still require periodic maintenance. Keep the solar panel clean and free of leaves, dust, bird droppings, and other debris. Also check whether trees or other objects have started blocking sunlight. Periodically verify the battery level, charging performance, camera position, and recording function to make sure the system continues to operate reliably.
Conclusion
Outdoor security camera maintenance doesn’t have to be complicated. A few simple checks each month can help keep your cameras clean, properly positioned, connected, and ready to record when you need them most.
Remember to clean the lens, inspect the housing and cables, check for moisture, test video and night vision, review detection and recording settings, and inspect your cameras after severe weather. For solar-powered cameras, don’t forget to keep the solar panel clean and unobstructed.
With a consistent outdoor security camera maintenance routine, you can catch small problems early, reduce unexpected downtime, and help your surveillance system deliver reliable protection year-round.