Contents
Introduction
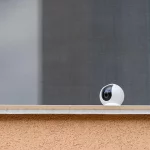
Window cameras have become an increasingly popular security solution, especially for renters, apartment dwellers, and homeowners who want extra protection without drilling holes or installing outdoor equipment. Placing a security camera behind a window and pointing it outside sounds simple—but in reality, it often comes with unexpected challenges.
Many users discover issues such as glare, reflections, poor night vision, or unreliable motion detection after installing a camera behind glass. These problems can significantly reduce video quality and limit the camera’s effectiveness.
In this guide, we’ll explain whether security cameras can work through glass, the most common problems, practical solutions, and best practices for setup. We’ll also compare window cameras with outdoor cameras to help you decide which option works best for your situation.
Can Security Cameras Work Through Glass?
Yes, security cameras can work through glass—but with limitations.
Glass itself does not block visible light, so during the daytime, many cameras can capture usable footage through a window. However, modern security cameras rely on more than just visible light. Features like infrared night vision, motion detection, and AI-based alerts can behave very differently when glass is involved.
In short:
— Daytime viewing: Often acceptable with proper placement
— Night vision: Frequently problematic
— Motion detection: Less reliable
— Image clarity: Highly dependent on lighting, reflections, and glass quality
Understanding these limitations is key to setting realistic expectations for window camera performance.
Common Problems When Using Cameras Through Glass
1. Glare and Reflections
One of the most common issues is glare caused by indoor lighting. Lamps, ceiling lights, or TV screens can reflect off the glass, appearing as bright spots or haze in the footage.
This problem is especially noticeable at night when indoor lights are on and the outside environment is dark.
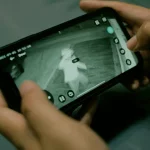
2. Infrared Night Vision Interference
Most security cameras use infrared (IR) LEDs for night vision. When a camera is placed behind glass, the IR light reflects directly back into the lens instead of illuminating the outdoor area.
This results in:
Washed-out footage
White fog or glowing dots
Completely unusable night images
This is one of the biggest drawbacks of using a camera through a window.
3. Reduced Motion Detection Accuracy
Motion sensors can struggle when looking through glass. Reflections, shadows, passing headlights, or sudden light changes may trigger false alerts, while real motion outside may be missed.
Some cameras rely on pixel-based motion detection, which becomes less reliable when glare or reflections are present.
4. Image Distortion and Reduced Sharpness
Window glass is rarely perfectly clean or optically clear. Dust, smudges, condensation, or double-pane windows can slightly distort the image, reducing sharpness—especially when zooming in.
5. Weather-Related Issues
Condensation, frost, rain streaks, or dirt on the exterior side of the window can negatively affect image quality. Unlike outdoor cameras, window cameras cannot be easily repositioned to avoid these conditions.
Best Solutions to Improve Camera Performance Through Glass
1. Disable Infrared Night Vision
If your camera allows it, turning off IR night vision is often the most effective fix. Instead, rely on:
Ambient street lighting
Porch lights
Motion-activated outdoor lights
This eliminates IR reflection and significantly improves nighttime clarity.
2. Use External Lighting
Adding outdoor lighting helps compensate for the lack of night vision. Soft, consistent lighting works better than harsh spotlights, reducing shadows and glare.
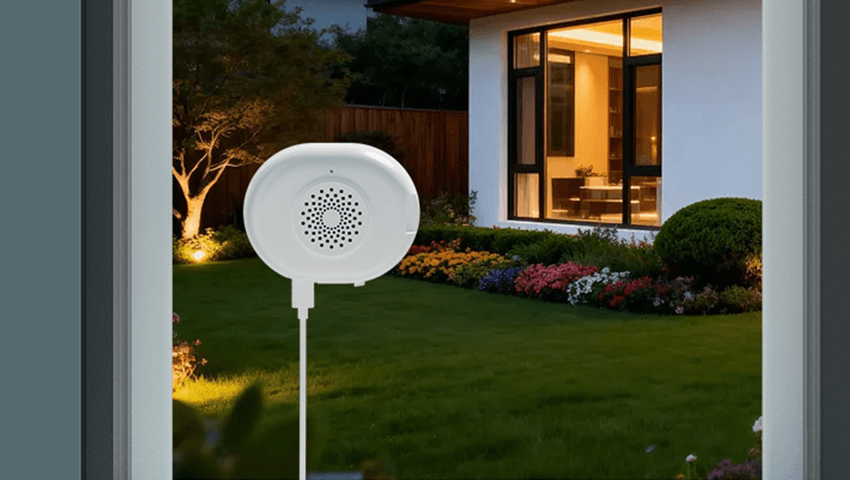
3. Position the Camera Close to the Glass
Placing the camera as close as possible to the window minimizes reflections. Ideally, the lens should be nearly flush with the glass, leaving no gap for light to bounce around.
4. Turn Off Indoor Lights Near the Window
Reducing indoor light sources near the camera greatly improves nighttime footage. Close curtains or blinds around the camera while keeping the lens area clear.
5. Clean Both Sides of the Window
A clean window makes a noticeable difference. Remove fingerprints, dust, water spots, and streaks from both the inside and outside surfaces.
6. Adjust Camera Angle Carefully
Avoid pointing the camera at an angle. A straight-on view reduces reflections and distortion. Even slight tilts can increase glare.
Best Practices for Window Camera Setup
1.Choose the Right Window
Not all windows are equal. Single-pane glass generally works better than double-pane or tinted windows. Avoid windows with heavy coatings or decorative textures.
2.Avoid Direct Sunlight
Direct sunlight can cause overexposure, glare, and heat buildup. North-facing or shaded windows often provide more stable lighting conditions.
3.Secure the Camera Firmly
Use stable mounts or stands to prevent vibration. Even small movements can affect motion detection and image clarity.
4.Test Before Final Placement
Always test footage at different times of day—morning, afternoon, evening, and night—to identify issues early.
5.Adjust Motion Sensitivity
Lower motion sensitivity can help reduce false alerts caused by reflections or passing headlights.
Window Cameras vs Outdoor Cameras
1.Window Cameras: Pros and Cons
Pros
— No drilling or permanent installation
— Easy to move or reposition
— Ideal for renters
— Protected from weather
Cons
— Poor night vision performance
— More glare and reflections
— Limited viewing angles
— Less reliable motion detection
2.Outdoor Cameras: Pros and Cons
Pros
— Designed for night vision
— — Better motion detection accuracy
— Wider field of view
— No glass interference
Cons
— Requires installation
— Exposure to weather
— May need permission for mounting
When Is a Window Camera a Good Choice?
A window camera can be a good option if:
— You live in an apartment or rental property
— Outdoor installation is not allowed
— You mainly need daytime monitoring
— The area is well-lit at night
— You want a quick, temporary solution
However, for full-time security—especially overnight—outdoor cameras generally offer better reliability and performance.
FAQs
Q: Can night vision cameras see through glass?
A: Infrared night vision does not work well through glass due to reflection. Disabling IR and using external lighting is recommended.
Q: Will double-pane windows affect camera quality?
A: Yes. Double-pane glass can cause additional reflections and slight image distortion, especially at night.
Q: Can motion detection work through windows?
A: It can, but it’s less accurate. Reflections and light changes may trigger false alerts or missed events.
Q: Are window cameras legal to use?
A: Generally yes, as long as they do not record areas where people expect privacy, such as neighboring homes or private spaces.
Conclusion
Using a security camera through a window can be a convenient and renter-friendly solution, but it comes with clear limitations. Glare, night vision issues, and reduced motion accuracy are common challenges that can’t be completely eliminated—but they can be minimized with the right setup.
By disabling infrared night vision, controlling indoor lighting, positioning the camera correctly, and following best practices, you can significantly improve window camera performance. Still, if reliable nighttime monitoring and advanced detection are your priorities, an outdoor camera remains the better long-term choice.
Understanding the trade-offs helps you choose the right solution for your home, lifestyle, and security needs—ensuring you get the most value from your surveillance setup.
Related Posts