As home security becomes smarter and more flexible, many homeowners want to install outdoor cameras without dealing with long power cables or higher electricity bills. That’s where solar power makes a difference.
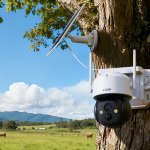
Solar-powered wireless security cameras offer a reliable and eco-friendly solution—especially for driveways, gardens, farms, cabins, and other areas without easy access to power outlets.
In this guide, you’ll learn what you need to build a solar-powered camera system, how to size the right solar panel and battery, step-by-step installation tips, key factors to consider, and possible alternatives.
Let’s get started.
Contents
Why Use Solar Power for Outdoor Wireless Security Cameras?
Traditional wired cameras require drilling, trenching, and running electrical cables. Even battery-powered cameras need frequent recharging.
Solar-powered systems solve both problems.
Key Benefits:
No need for nearby power outlets
Reduced electricity costs
Cleaner installation with minimal wiring
Ideal for remote or off-grid locations
Backup power during outages
Eco-friendly energy solution
Solar power is especially useful in locations such as:
Long driveways
Detached garages
Barns and farms
Construction sites
Vacation homes
Garden sheds
If your camera only needs low wattage and operates on motion detection rather than continuous recording, solar power can be extremely efficient.
What You Need to DIY Solar-Powered Outdoor Security Cameras
To build a reliable solar-powered camera setup, you’ll need the following core components:
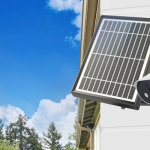
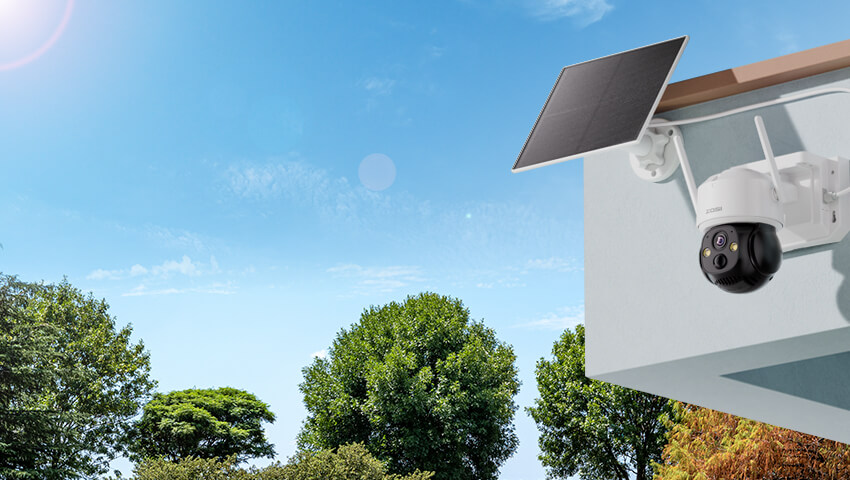
1. Solar Panel
The solar panel converts sunlight into electricity. Most wireless outdoor security cameras work well with panels ranging from 5W to 20W, depending on power consumption.
When choosing a panel, consider:
Output voltage (commonly 5V, 6V, or 12V)
Weather resistance (IP65 or higher recommended)
Adjustable mounting bracket
2. Rechargeable Battery
The battery stores energy generated during the day so the camera can run at night or on cloudy days.
Look for:
Lithium-ion or LiFePO4 batteries
Enough capacity for at least 2–3 days without sunlight
Built-in protection against overcharge and over-discharge
3. Solar Charge Controller
This component regulates voltage between the solar panel and the battery. It prevents:
Overcharging
Over-discharging
Voltage spikes
Never connect a solar panel directly to a camera without proper regulation unless it’s specifically designed for that model.
4. Wireless Outdoor Security Camera
Choose a low-power model with features such as:
Motion detection recording
Smart alerts
Efficient standby mode
WiFi or 4G LTE connectivity
Cameras with continuous recording consume significantly more power and may require larger solar setups.
5. Mounting Hardware & Weatherproof Cables
You’ll also need:
Mounting brackets
Stainless steel screws
Waterproof cable connectors
UV-resistant wiring
Proper installation ensures long-term durability.
Step-by-Step Guide: How to Power Your Wireless Outdoor Camera with Solar
Step 1: Check Your Camera’s Power Requirements
Start by reviewing your camera’s specifications:
Voltage (V)
Power consumption (W)
Standby vs. active consumption
For example:
If your camera uses 3W on average and runs 24 hours:
3W × 24h = 72Wh per day
This is your daily energy requirement.
Step 2: Calculate Solar Panel Size
To calculate solar panel requirements:
Daily energy need ÷ Average peak sun hours = Required panel output
If your location receives 4 peak sun hours per day:
72Wh ÷ 4h = 18W panel needed
Add 20–30% buffer for cloudy days.
In this case, a 20W solar panel would be appropriate.
Step 3: Size the Battery Correctly
To ensure backup for cloudy days:
Daily consumption × backup days = battery capacity needed
Example:
72Wh × 3 days = 216Wh
If using a 12V battery:
216Wh ÷ 12V = 18Ah battery required
Always oversize slightly for reliability.
Step 4: Install the Solar Panel
Best practices for installation:
Face south (in Northern Hemisphere)
Tilt angle roughly equal to your latitude
Avoid shade from trees or buildings
Mount securely against wind
Even partial shading can dramatically reduce output.
Step 5: Connect the System
Correct connection order:
Connect battery to charge controller
Connect solar panel to controller
Connect camera to battery output
Double-check polarity before powering on.
Step 6: Test and Monitor
After installation:
Confirm camera powers on
Check charging indicator
Test motion alerts
Monitor battery levels for 1 week
Adjust panel angle if charging is insufficient.
DIY Solar-Powered Wireless Security Camera: Key Factors to Consider
1. Sunlight Availability
Solar systems depend entirely on sunlight. If your area has long winters or frequent rain, you may need:
Larger battery capacity
Higher wattage panel
2. Weather Resistance
Ensure:
Solar panel: IP65 or higher
Camera: IP66 recommended
Sealed cable joints
Water intrusion is a common cause of system failure.
3. Camera Recording Mode
Motion-triggered cameras use far less power than 24/7 recording systems.
If you need continuous recording, solar may require a significantly larger system.
4. WiFi Signal Strength
Wireless power does not mean wireless internet. Your camera must still connect reliably.
Consider:
WiFi range extenders
4G LTE cameras for remote areas
5. Maintenance Requirements
Solar systems are low maintenance, but not maintenance-free.
You may need to:
Clean panels every 2–3 months
Remove snow in winter
Inspect wiring annually
Dust and debris can reduce charging efficiency.
Common Mistakes to Avoid When Installing Solar Camera
Undersizing the solar panel
Ignoring battery backup capacity
Installing panel in shaded areas
Skipping voltage regulation
Using indoor-rated cables outdoors
Forgetting winter sun angle changes
Planning properly prevents most failures.
Other Alternatives to Solar-Powered Wireless Security Cameras
If solar isn’t ideal for your situation, consider these options:
1. Battery-Only Cameras
Pros:
Simple installation
No wiring
Cons:
Requires periodic charging
Best for low-traffic areas.
2. PoE (Power over Ethernet) Systems
Pros:
Stable power and data through one cable
Ideal for continuous recording
Cons:
Requires cable installation
Best for permanent home installations.
3. Plug-In Wired Cameras
Pros:
Most stable power source
No battery maintenance
Cons:
Requires nearby outlet
Best for walls close to electrical access.
4. Hybrid Systems (Solar + Wired Backup)
Some advanced setups use:
Solar as primary power
Wired backup during long cloudy periods
Ideal for mission-critical surveillance.
FAQs
Q:How do wireless security cameras get their power?
A: Wireless cameras are usually powered in one of three ways: a built-in rechargeable battery, a wired adapter connected to a power outlet, or a solar panel. Battery-powered models are more flexible and easier to install, while solar-powered cameras combine the convenience of wireless installation with long-term energy efficiency.
Q:Can solar cameras work without full sunlight?
A: Yes. Solar-powered cameras don’t need sunlight all day to function. Most cameras require several hours of direct sunlight to keep the battery charged. Light cloud cover or partial shade is generally fine, but heavy shade or prolonged overcast conditions can reduce charging efficiency and may shorten battery life.
Q: Do solar-powered security cameras work in winter?
A: Yes, but charging efficiency decreases due to shorter daylight hours and lower sun angles. Oversized panels help compensate.
Q:How long can a solar-powered camera run without sunlight?
A: With a properly sized battery, most solar cameras can operate for 2–5 days without direct sunlight. Larger battery capacities or higher-wattage solar panels can extend this backup period, ensuring continuous monitoring during cloudy or rainy weather.
Conclusion
Solar power is one of the most flexible and eco-friendly ways to power wireless outdoor security cameras—especially in areas without easy electrical access.
By properly calculating energy needs, choosing the right solar panel and battery, and installing the system strategically, you can create a low-maintenance, long-term surveillance solution.
Whether you’re protecting a remote cabin, monitoring livestock, securing a driveway, or installing a camera on a detached garage, solar-powered wireless security cameras offer independence, efficiency, and peace of mind.
If you plan carefully, solar can power your outdoor security for years with minimal intervention.
Related Posts